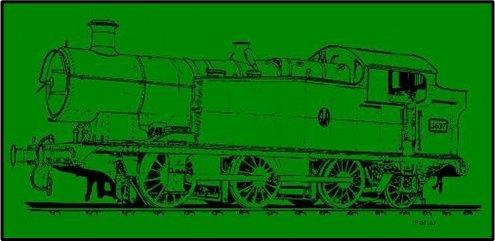
On the expiry of 5637's 10 year boiler certificate it was estimated that an overhaul would cost £100,000 and take 2 years to complete.
boiler certificate expiry
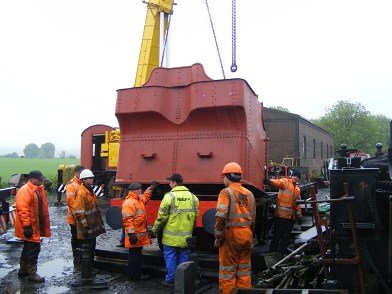
5637 was due to have a heavy general overhaul (HGO) on the expiry of its 10 year boiler certificate in September 2007, unfortunately this was brought forward by the failure of one of the centre stub axles. The axle in question had begun to slip and fret in the wheel boss it was pressed into, so the locomotive was taken out of service in June and the East Somerset Railway (ESR) workshop team began dismantling the engine.
Work Required
A preliminary survey discovered that by and large the chassis assembly had no serious faults but had a number of defects due to normal wear and tear. Axle boxes, crossheads, brake pins, big ends, eccentrics and motion pins were all worn and required attention. The coal bunker needed to be virtually renewed as did other items with thin plating. The boiler was known to have thinning plates and other defects that the ESR had been monitoring under the supervision of the Boiler Inspector.
The initial estimate was two years to complete the HGO at a cost of around £40,000 for materials.
Chassis
Starting with the chassis, the front buffer beam assembly was replaced with new material. The piston valves were in good order unlike the main piston rings which were replaced. Both cross heads had to be white-metalled and machined and the slide bars assembled and centred to reflect the new size of the cross-heads. All the motion pins and associated bushes were replaced with new items.
One of the centre sub axles had begun to fail and after replacement the axel boxes were realigned.
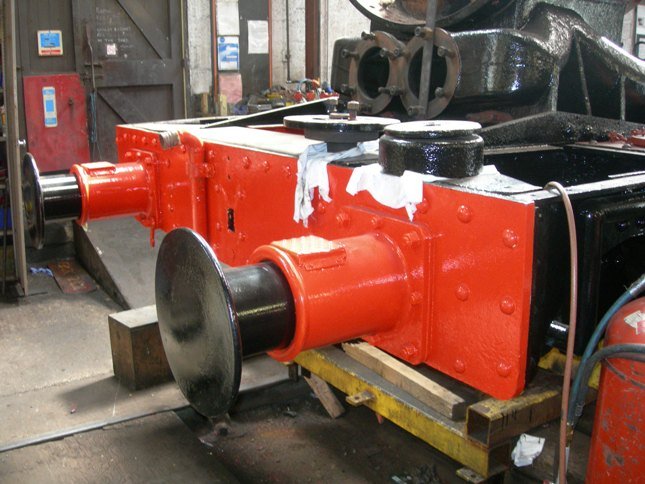
Axle Stub Repair
The centre axle unit went away to Riley’s of Bury for essential repairs to be carried out. The failing axle was removed and replaced by a new one that started life as a raw billet of steel imported from South Africa. This was machined to size and pressed into place with a reported 100 ton force.
After replacing an axle it canít be guaranteed that both wheels will retain their original relationship, i.e. still be parallel/square to one another. If this was not the case, then the whole axle assembly would need to be trued up on a wheel lathe. In normal service, all three sets of driving wheels would wear together at the same rate, however because the centre set had been machined to a new set of dimensions the other two main driving axle sets must also be re-machined to the new dimensions to ensure equal spring loading.
Thankfully for 5637 the two wheels did remain in alignment, but this does show that simple projects can have additional costs, as an expensive repair to the centre axle had not been anticipated in the early planning stages of 5637’s HGO. Just to give an idea of what the impact might have been, the Severn Valley Railway had to replace the whole centre axle assembly on a GWR Pannier at a cost of around £30,000 and 5637’s sister engine 6619 on the North Yorkshire Moors Railway has undergone a full centre axle renewal at a cost of around £50,000. 5637 got away lightly with a repair costing around £8,000.
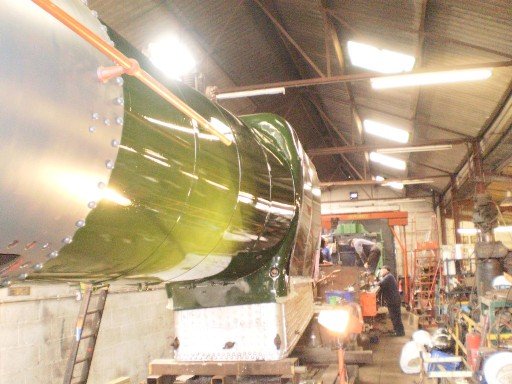
Photo: L Thorpe
The repaired crank axle and wheels
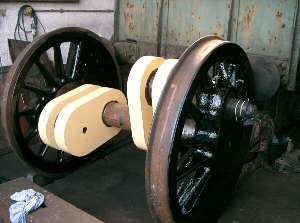
Axle Boxes
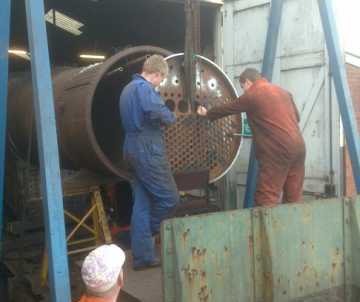
With the return of the centre axle unit back to the ESR, work could begin on aligning all six axle box centres, machining the horn guides back to square and flat relative to one another. Each axle-box was re-shimmed so it was not only centred in its frame with its partner on the other side but also maintained the correct dimensions to the axle-boxes on the other wheel sets.
It is crucial that the working clearances between the centre axle’s two axle-boxes and their associated horn guides are within a few thousands of an inch. The reason for this being that the pistons and their connecting rods are attached to the centre axle big end cranks. If there is too much free movement then the range of movement of a piston could be exaggerated and strike both cylinder covers causing extensive damage.
The loco's motion was reassembled, repairs carried out to the side tanks and a new coal bunker fabricated.
Motion
Once all wheel sets were back in the horn guides, the big-ends, eccentrics and side rod bearings could be white-metalled, machined and refitted. When the side rod bearings had been refitted the rest of the motion, cross-heads, pistons, glands and piston valves were refitted and correctly set for accurate piston valve openings. This is essential for efficient and effective running.
Side Tanks & Bunker
With money running out it was decided to carry out patch repairs to the two water side tanks rather than replace them as was originally intended. The same approach couldn’t be taken with the coal bunker, as it had suffered badly from corrosion and a goodly amount of steel plate had to be removed and replaced.
To acquire the steel and set the bends for the complex curves of the coal bunker took some time. Many parts had to be both welded and riveted into place to retain the original look. It was felt, that whilst a LNER J94 bunker would be much cheaper to install, the more expensive but traditional outline should be retained.
The above details the repairs to the larger items but there was a need to source, fettle or repair many other items such as pipe work, rivets, nuts, bolts and various miscellaneous small items.
The boiler proved to be the most expensive item to repair in comparison to the chassis unit. The following had to be replaced:-
Smoke box
Super heater elements (6 sets)
Front tube plate
Outer firebox wrapper lower side plate
Crown stays (126)
Front outer plate
Longitudinal stays (4)
Rear firebox plate.
Washout plugs
Vacuum ejector
Blower
Rivets (copper)
Small tubes (218)
Rivets (steel)
Large tubes (6)
Credit where credit is due, a lot of effort by the ESR Engineering Manager resulted in some excellent offers and deals in sourcing materials for the above mentioned work.
The front tube plate came from the Birmingham Railway Museum at half price, fully machined and virtually ready to fit. Luckily the Boiler Inspector, Mr J. Glaze knew of the tube plate’s existence and a good price was negotiated for it. Much of the other material had to come from approved sources with the appropriate documentation to prove that it was of the correct standard, quality and traceability. This meant the cost of such items was on the high side but again some diligent searching found the required components at competitive prices.
The bottom ten inches of the outer firebox plate had to be replaced and new three foot inserts fitted in place.
The Firebox
It was noticeably cheaper if a lot of work was done in-house by the ESR. Steel formers were manufactured to bend and shape the curves and bends for the firebox plates. The bottom ten inches of outer firebox steel plate had to be removed due to thinning and scouring, and replaced by new plate. This plate is secured in place by welding, stays and rivets. The welding had to be to the high standard set by the Insurance Company and once carried out it had to be inspected by means of non-destructive testing. This was a specialist activity that an approved outside contractor was employed to carry out.
Grooving was discovered on the water side of both the front and rear outer firebox plates. The affected plate was removed and new three foot inserts made that were welded, stayed and riveted in place as before. The word riveting implies a simple task of popping a red-hot rivet into place and hammering it over. In fact each old steel rivet had to be carefully removed to minimise damage to the surrounding plates. The apertures in each plate were reamed out to clean them then a properly sized red-hot rivet was fitted and beaded into place. Where steel or copper stays were fitted, the holes were reamed out, threaded and a new stay inserted. A nut was fitted on the fire side of the stay, on the outer plates the stay was riveted over. As can be seen, a simple job had many repetitive actions before it could be considered complete.
Photo: Peter Todd
The slots cut in the backhead ready to fit new inserts.
Once the 126 crown stays had been laboriously replace the boiler underwent successful hydraulic and steam testing.
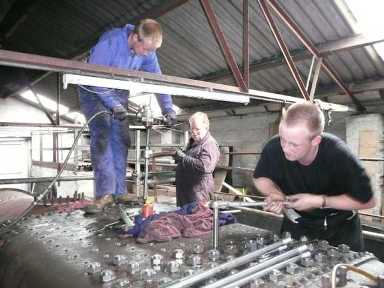
Crown Stays
The replacement of the 126 crown stays was a long and arduous task. The stays are steel bars about three feet long, an inch and a quarter inch thick and threaded at both ends. The old stays had to be carefully removed, the original threaded holes cleaned up, reamed to size and re-threaded to a slightly larger size. The new stays were then screwed into place, fitted with nuts & washers and beaded over to seal against any leaks. This was not a job for the faint hearted as some of the operations worked out at 252 work activities.
Photo: R Bellchambers
Chris, Alex and Dick tap holes for the new crown stays.
Inspections
The pitting found on the internal boiler plates was rectified by welding. At pre-determined stages and once all the repairs to the boiler were complete, the Boiler Inspector carried out inspections to ensure the work had been done to the highest standard. Once he was satisfied with the repairs, work could then commence on the re-assembly of the boiler. In went the riveted front tube plate, large and small tubes, longitudinal stays, smoke box, safety valves, valves and fittings of all descriptions, vacuum ejector and blower. Finally the big day arrived when the boiler was hydraulically tested to 300psi followed by a successful team test to 200psi, the locomotiveís normal operating pressure.
The boiler was replaced in the loco's fames and after being repainted 5637 finally re-entered service.
Back into Service
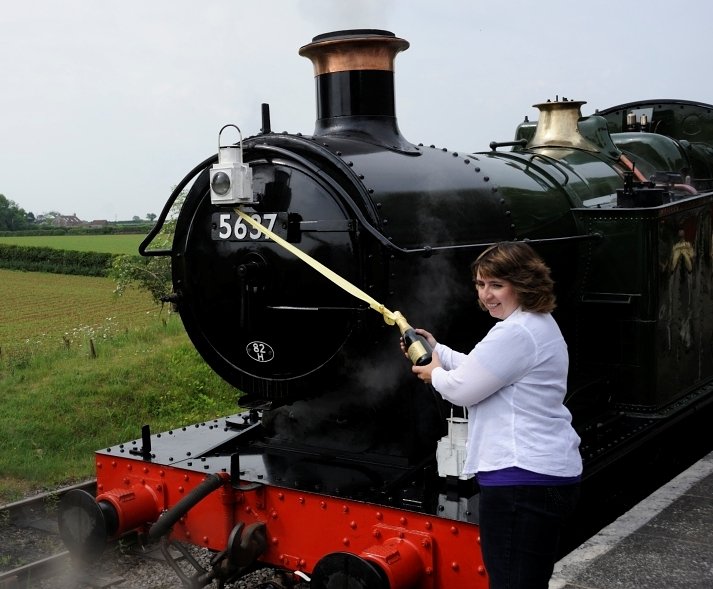
During May 2010 the boiler was refitted in the frames, along with all the other essential bits and pieces and the loco given a superb paint job. 5637 was commissioned back into service before an admiring audience on Saturday the 5th June 2010. This was virtually three years to the date the locomotive was withdrawn from service with the final expenditure on materials being around £60,000.
This brief description of the engineering activities of the East Somerset Railway’s Engineering Department ably led by their Engineering Manager, Mr. Stephen Masters, does not do justice to the amount of work, skill, time and effort expended in returning 5637 back to active service. A great many thanks go to these good people.
Whilst 5637 is now back at work, it is a continuing task to keep the engine in service and in the peak of condition as there is always work of some sort that needs to be carried out.
Photo: Peter Todd
SLG Committee Member Diana Ball inaugurates 5637 back into service